
こんにちは!株式会社メモリアインクのふくしまです!
今日は、UITableViewを使ってリストを作りつつ、リスト内のセル(Cell)をタップすると任意の画面へ遷移させる方法について解説していきます。
この記事を読んで分かること…
・UITableViewの基本的な使い方
・テーブル内のセル(Cell)をタップした時の処理の実装方法
逆に、セルを自由にカスタムする方法(カスタムセル)についてはこの記事では触れていないので、こちらの記事をご参照ください!
では早速、超簡易的な英単語帳アプリを作成しつつ、UITableViewについて学んでいきましょう!
環境
Xcode 15.2
Swift 5.9.2
1章:UITableViewを使って英単語リストを作成しよう!
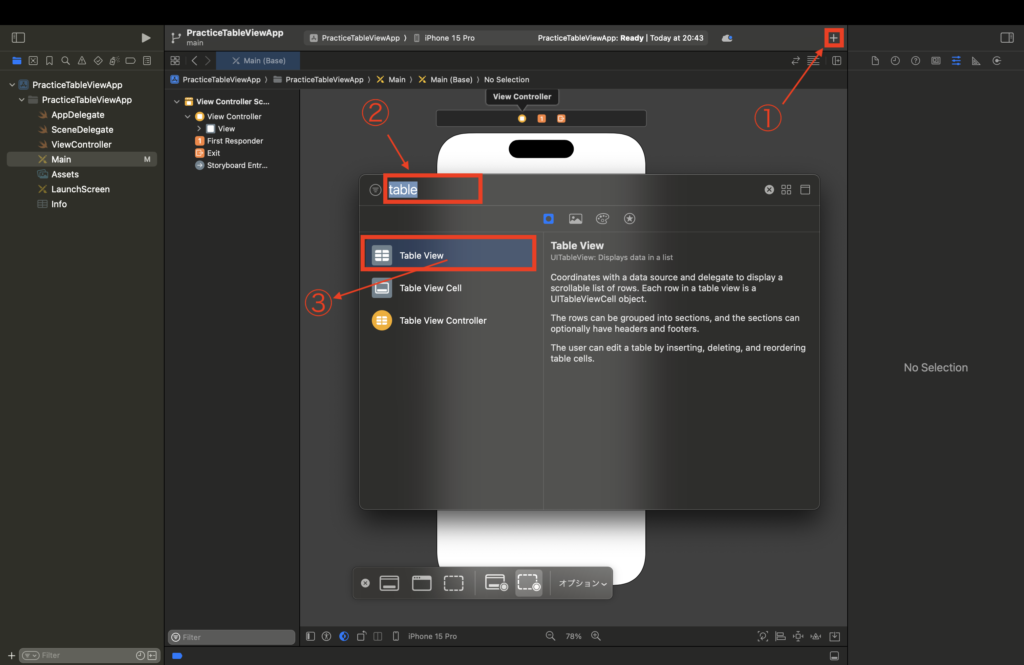
Step1:英単語リスト画面に必要なオブジェクトを配置
①英単語リスト画面のViewControllerを選択して、「+」をタップ
②「table」で検索して、出てくる「Table View」を選択
③ViewControllerの画面上にドラッグ&ドロップ
④セーフエリアを避けて画面いっぱいに広げる
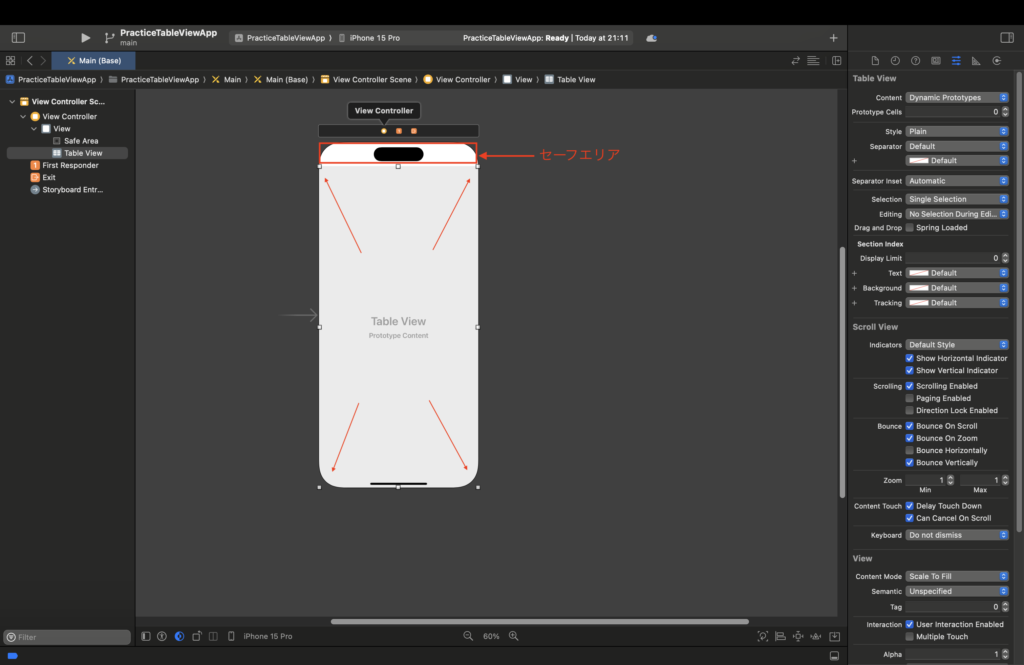
※セーフエリアとは、電波状態や残電池、時間などのOS固定のものを表示するエリアとなります。
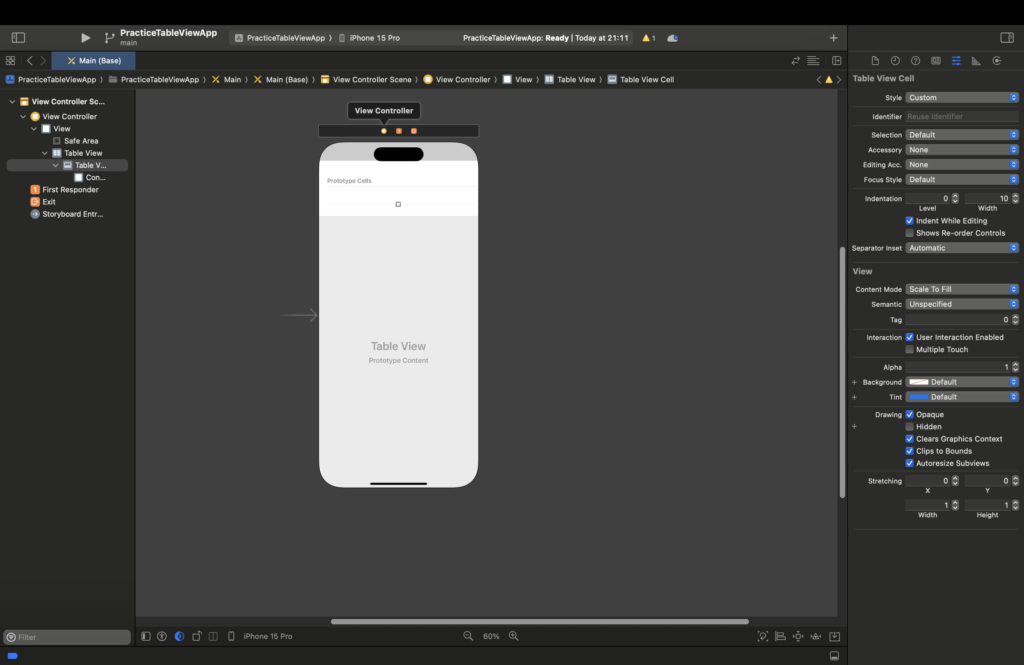
⑤①〜③と同様にして「Table View Cell」を先ほど配置した「TableView」オブジェクト上に配置
Step2:storyboardからdataSource、delegateを設定
control (もしくは右クリック)を押しながら、以下のようにドラッグして「dataSource」「delegate」ともに選択
以下のように「TableView」で右クリックして、「dataSource」と「delegate」が設定されていたらOKです!
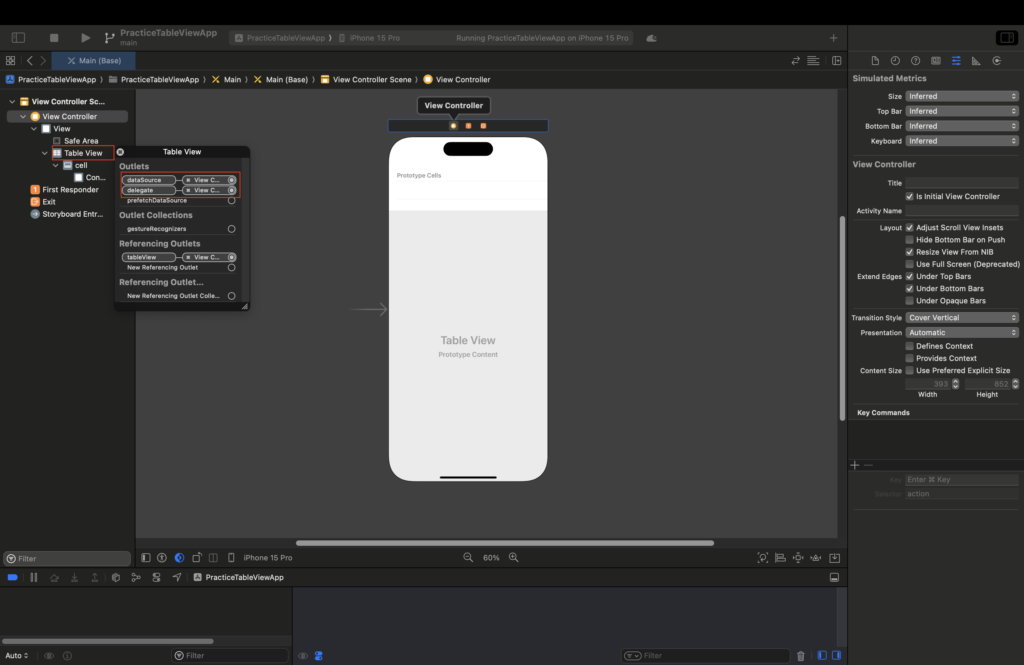
dataSource・delegateとは?
dataSource…テーブルにデータを表示するためのプロトコル
delegate…リストの行数を返したり、セクションを返すなどのデリゲートメソッドの処理をViewControllerに依頼する
プロトコル・デリゲートについて以下の記事で詳しく説明してるのでご参照ください!


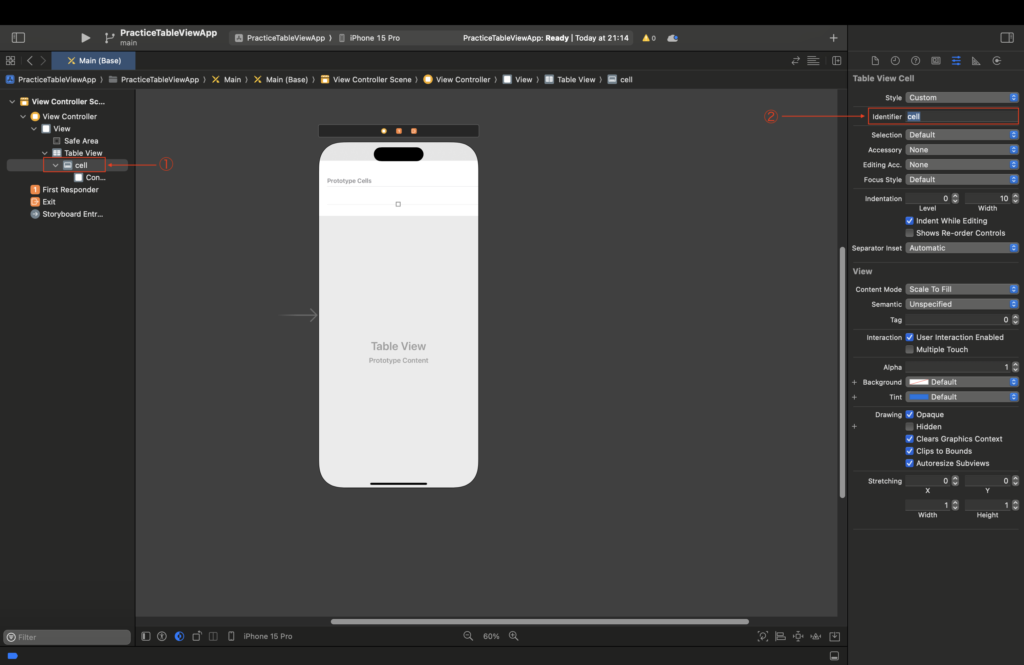
Step3:配置したTableViewCellのIdentifireを設定する
①配置したTableViewCellを選択する
② Identifireを設定(適当な名前でOK!)
Step4:StoryBoardのオブジェクトとViewControllerの紐付け
①Storyboard上で対象のViewControllerを選択(Command+Option +Control +Enter で対応するクラスを表示できます)※今回はViewController クラス
②以下のようにStoryboardのTableViewオブジェクトからドラッグ(この時TableViewCellから引っ張ってこないように注意しましょう!)
以下のようにコードに反映されます。プロパティ名はなんでもO K!
@IBOutlet weak var tableView: UITableView!Step5:UITableViewDelegate, UITableViewDataSourceを設定、メソッド実装
①クラスを定義している箇所で、UITableViewDelegate ,UITableViewDataSource を追加する
class ViewController: UIViewController, UITableViewDelegate, UITableViewDataSourceUITableViewDelegate・UITableViewDataSourceについてはこちら!
②そうすると以下のようなマークが出るのでタップ→Fix(マークは2回出ます)
※UITableViewDelegate ,UITableViewDataSource で定義されているプロトコルのメソッドを必ず実装してくださいね〜って教えてくれてます。Fixを押すと自動的に必要なメソッドを定義してくれます。
③作られたメソッドは可読性のため、viewDidLoad() メソッドの後ろに持っていっておきましょう!
class ViewController: UIViewController, UITableViewDelegate, UITableViewDataSource {

...

override func viewDidLoad() {
        super.viewDidLoad()
        tableView.delegate = self
        tableView.dataSource = self
    }

func tableView(_ tableView: UITableView, numberOfRowsInSection section: Int) -> Int {
    <#code#>
}

func tableView(_ tableView: UITableView, cellForRowAt indexPath: IndexPath) -> UITableViewCell {
    <#code#>
}
この時、viewDidLoad()内に以下のソースを追加。
tableView.delegate = self
tableView.dataSource = self
このコードは、「TableViewから処理を任される際に、自身のクラス(self )に対して通知してくださいね〜」ってこと要求しています。
④Cellのテキストに入れるデータを配列のプロパティとして定義する
let EnglishArray = ["anarchy", "catharsis", "eden"]⑤最後に②で作られたメソッドに具体的な処理を書いていく
func tableView(_ tableView: UITableView, numberOfRowsInSection section: Int) -> Int {
    return englishArray.count
}

func tableView(_ tableView: UITableView, cellForRowAt indexPath: IndexPath) -> UITableViewCell {
    let cell = tableView.dequeueReusableCell(withIdentifier: "cell", for: indexPath)
    cell.textLabel!.text = englishArray[indexPath.row]
    return cell
}
コード説明:
1行目のtableView(numberOfRowInSection:) メソッドでは、テーブルのリストに何行表示するかを定義します。
2行目のenglishArray.count で配列に格納されたデータの個数を出し、それを返り値として返却(return)しています。
5行目のtableView(cellForRowAt:) メソッドでは、各行ごとにCellを指定します。indexPath には行のデータが渡されてきています。
6行目のdequeueReusableCell(withIdentifier: , for: ) メソッドで各行のセルを取得します。
引数withIdentifier にはStep3で設定したCellの Identifireを、引数for には渡ってきた行のデータindexPath を設定します。
7行目で、取得したcellのtext プロパティにenglishArray プロパティのデータを順に入れています。indexPath.row は行番号で最初のセルの行番号が0から始まり1、2、3…と続くため、そのまま配列のインデックス番号として指定できます。
最後に8行目で、cellオブジェクトを返却(return)します。
これで、第1章は完了です!
以下のように表示されていればOKです!
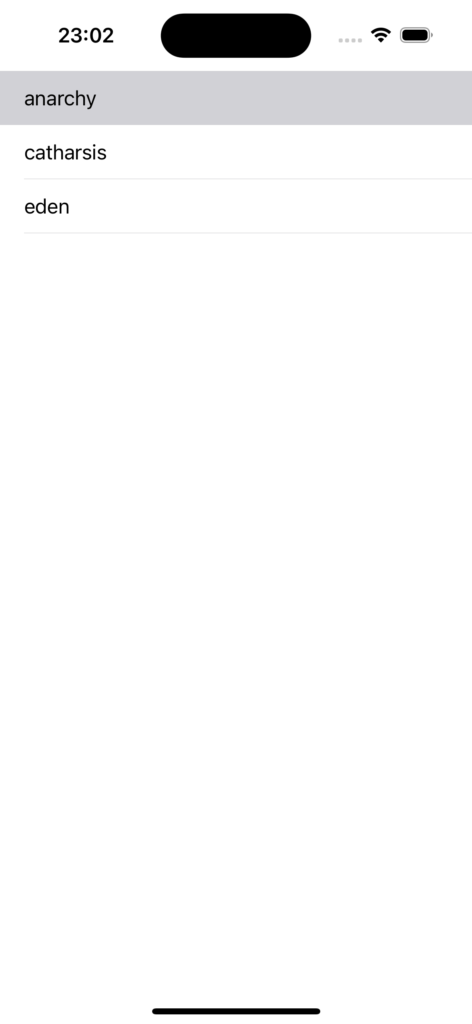
現在までの全体ソースコード:
import UIKit
ん
class ViewController: UIViewController, UITableViewDelegate, UITableViewDataSource {

    @IBOutlet weak var tableView: UITableView!

    let englishArray = ["anarchy", "catharsis", "eden"]

    override func viewDidLoad() {
        super.viewDidLoad()
        // Do any additional setup after loading the view.
    }

    func tableView(_ tableView: UITableView, numberOfRowsInSection section: Int) -> Int {
        return englishArray.count
    }

    func tableView(_ tableView: UITableView, cellForRowAt indexPath: IndexPath) -> UITableViewCell {
        let cell = tableView.dequeueReusableCell(withIdentifier: "cell", for: indexPath)
        cell.textLabel!.text = englishArray[indexPath.row]
        return cell
    }
}
第2章:セルをタップした時に画面を遷移させよう!
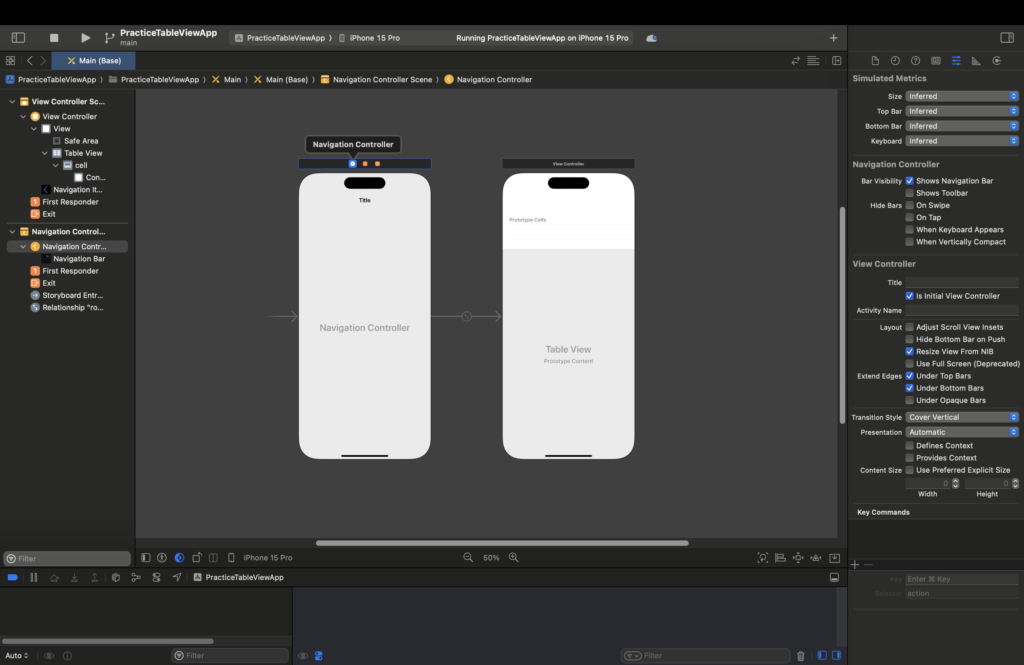
Step1:NavigationControllerを継承
第一章で作ったViewControllerを選択して、Editor→Embed in→Navigation Controllerの順でタップ
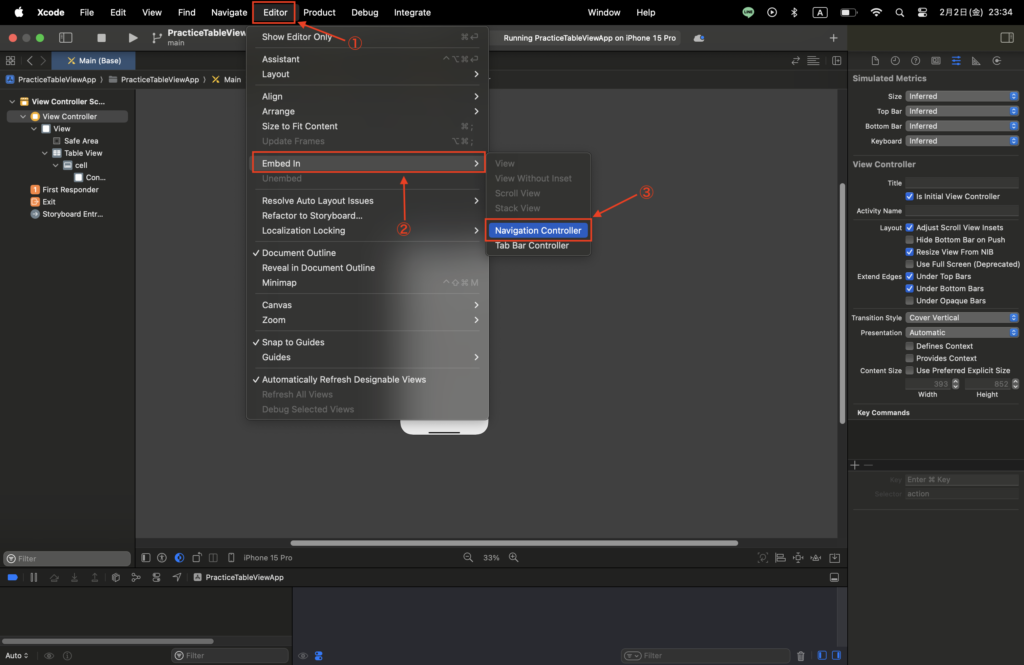
以下のようになっていたらOK!
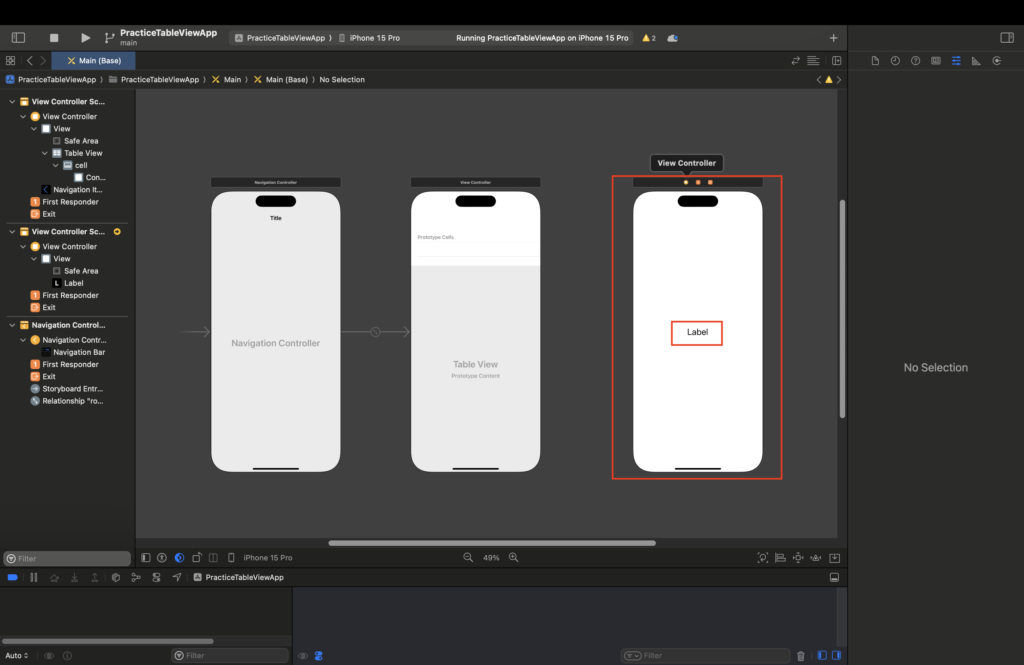
Step2:遷移先の画面とクラスを用意する
①ViewControllerオブジェクトとLabelオブジェクトを配置
②JapaneseTranslationViewController クラスを定義(今回は範囲外なのでコードの説明は割愛します)
import UIKit

class JapaneseTranslationViewController: UIViewController {

    @IBOutlet weak var japaneseLabel: UILabel!
    var japaneseText: String?

    override func viewDidLoad() {
        super.viewDidLoad()
        if let japanese = japaneseText{
            if japanese == "anarchy" {
                japaneseLabel.text = "無秩序"
            } else if japanese == "catharsis" {
                japaneseLabel.text = "感情の浄化"
            } else if japanese == "eden" {
                japaneseLabel.text = "楽園"
            }
        }
    }
}
Step3:セルをタップした時の処理を定義する
①遷移元のViewControllerクラスで以下の処理を追加する
func tableView(_ tableView: UITableView, didSelectRowAt indexPath: IndexPath) {
        let cell = tableView.dequeueReusableCell(withIdentifier: "cell", for: indexPath)
        cell.textLabel!.text = englishArray[indexPath.row]
        let nextView = self.storyboard?.instantiateViewController(withIdentifier: "japaneseTranslation") as! JapaneseTranslationViewController
        nextView.japaneseText = cell.textLabel!.text
        self.navigationController?.pushViewController(nextView, animated: true)
}コード説明:tableView(didSelectRowAt:) メソッドがまさにセルをタップした時に走るメソッドです。
2行目・3行目はStep5の⑤で解説した通りです。
4行目はinstantiateViewController(withIdentifier:) で遷移先の画面をインスタンス化しています。
5行目で遷移先のjapaneseText プロパティに値を渡しています。
6行目でpushViewController メソッドでインスタンス化した遷移先のオブジェクト(nextView)を指定して、Push遷移をしています。
画面遷移については以下の記事で詳しく解説しているので是非ともご覧ください!

全体ソースコード:
import UIKit

class ViewController: UIViewController, UITableViewDelegate, UITableViewDataSource {

    @IBOutlet weak var tableView: UITableView!

    let englishArray = ["anarchy", "catharsis", "eden"]

    override func viewDidLoad() {
        super.viewDidLoad()
        // Do any additional setup after loading the view.
    }

    func tableView(_ tableView: UITableView, numberOfRowsInSection section: Int) -> Int {
        return englishArray.count
    }

    func tableView(_ tableView: UITableView, cellForRowAt indexPath: IndexPath) -> UITableViewCell {
        let cell = tableView.dequeueReusableCell(withIdentifier: "cell", for: indexPath)
        cell.textLabel!.text = englishArray[indexPath.row]
        return cell
    }

    func tableView(_ tableView: UITableView, didSelectRowAt indexPath: IndexPath) {
        let cell = tableView.dequeueReusableCell(withIdentifier: "cell", for: indexPath)
        cell.textLabel!.text = englishArray[indexPath.row]
        let nextView = self.storyboard?.instantiateViewController(withIdentifier: "japaneseTranslation") as! JapaneseTranslationViewController
        nextView.japaneseText = cell.textLabel!.text
            self.navigationController?.pushViewController(nextView, animated: true)
    }
}
以上で全ての実装が完了です!!
完成形をみてみましょう!
まとめ
いかがだったでしょうか?
UITableViewはアプリを開発する上でかなり高頻度で使われますので、今のうちに使い方に慣れておきましょう!
この記事があなたのスキルアップに役立ったなら、次のキャリアステップを踏み出す絶好の機会かもしれません。エンジニアとしてのさらなる成長と挑戦を求めるなら、
未経験からIT・Webエンジニアを目指すなら【ユニゾンキャリア】![]() をオススメします!
をオススメします!


コメント
コメント一覧 (1件)
[…] 【iOS/Xcode15】UITableViewの使い方+Cellタップで画面遷移する方法 […]